Posts

Showing posts from January, 2020

Raindrops on Roses

Image
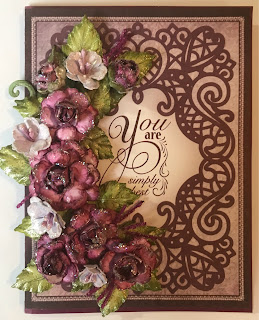
This is a simple little card made from the Raindrops on Roses Paper Collection.  I made the card base from a piece of dark plum cardstock measuring 5 1/4"x8".  Fold in half.  I used pop dots to adhere the paper with the sentiment to the front of the card. Using the Deluxe Flower Shaping Paper I stamped Classic Roses in StampinUp Blackberry Bliss.  I then colored the stamped images in lightly with StampinUp Berry Burst Ink.  I die cut the Roses using the Classic Rose Die.  I like to lightly mist the roses with water when I put them in the 3D Rose Shaping Mold.  For this card I made one large rose, 4 medium roses and 2 rose buds.  Use the Deluxe Flower Shaping Kit to finish shaping the roses and assemble with hot glue or Designer Dries Clear Adhesive. Using the same technique I stamped 8 of the Tweet Cherry Blossoms on the Deluxe Flower Shaping Paper.  8 stamped images will give you 4 finished blooms.  I stamped them in LuLu Lavender and lightly colored them.  Cut

With all My Love

Image
This particular card I made in a 6 1/2"x6 1/2" inch card front and attached it to a 6"x6" white card base.  You could easily adjust the outside dimensions to make the outside front card a 6"x6". I started with a 6 1/2"x6 1/2" piece of medium color lavender cardstock.  I then adhered a light lavender piece of cardstock on top that measures 6 1/4"x6 1/4".  I cut a piece of cardstock from the Lush Lilacs Paper Collection at 6"x6" and adhered to the light lavender piece of cardstock.   Cut one large oval die from the Eyelet Oval Die with the scalloped edge, and the 3.25x5" centerpiece in open lace work, in white cardstock.  I used the sponge daubers and lightly colored the edges in Lulu Lilac Ink. Cut two pieces from white cardstock from the Petite Pocket Accents Die. Glue the Petite Pocket Accents Die onto the oval. Stamp your sentiment from the For My Friend Sentiments in Jet Black and punch out with a small oval p

Always and Forever

Image
This is a sweet little wedding card created from Heartfelt Creations Stamps and Dies. Instructions: Create the card base by scoring a 10" x 7 1/4" piece of pink cardstock on the long side at 5".  Cut a decorative die from the Eyelet Lace Frames Die from white cardstock.  Find the cottage scene from the Calla Lily Paper Collection and cut it at 4 1/4" tall by 3 1/2" wide.  Center this scene in the opening of the Eyelet Lace Frames Die and run it through your cutting machine.  Remove the cut out scene and discard the scraps. Using Dries as Clear Glue, adhere the white cardstock Eyelet Lace Frames Die to the front of your card.  Then position the scene in the opening and glue it to the card front. Using the Oak Lane Blossoms Cling Stamp, stamp the flowers in a medium tan ink on the Deluxe Flower Shaping Paper.  I used StampinUp Crumb Cake.  I use two layers for each flower and I created 2 large flowers, 3 medium flowers and 5 small flowers. After stamping