Always and Forever

Instructions: Create the card base by scoring a 10" x 7 1/4" piece of pink cardstock on the long side at 5". Cut a decorative die from the Eyelet Lace Frames Die from white cardstock. Find the cottage scene from the Calla Lily Paper Collection and cut it at 4 1/4" tall by 3 1/2" wide. Center this scene in the opening of the Eyelet Lace Frames Die and run it through your cutting machine. Remove the cut out scene and discard the scraps.
Using Dries as Clear Glue, adhere the white cardstock Eyelet Lace Frames Die to the front of your card. Then position the scene in the opening and glue it to the card front.
Using the Oak Lane Blossoms Cling Stamp, stamp the flowers in a medium tan ink on the Deluxe Flower Shaping Paper. I used StampinUp Crumb Cake. I use two layers for each flower and I created 2 large flowers, 3 medium flowers and 5 small flowers. After stamping the flowers I used StampinUp Blushing Bride Ink and with a sponge dauber lightly colored the flowers.
I then stamped 8 of the small Tweet Cherry Blossoms on the Deluxe Flower Shaping Paper in Ranger Archival Ink in Vivid Chartreuse.
Using the coordinating Oak Berry Lane Blossoms Die and the Tweet Cherry Blossom Die I die cut the blossoms using a cutting machine.
After cutting the flowers out I lightly sponge the pink ink on the edges and a little on the back side edges of the Oak Berry Lane blossoms. I lightly sponged the Vivid Chartreuse on the white Tweet Cherry Blossoms. Run the blossoms through the cutting machine using the coordinating 3D Blossoms Shaping Mold and the Cherry Blossom Shaping Mold. I use the Deluxe Flower Shaping Kit with the black mat and gently shape the blossoms before gluing them together.
Assemble all the blooms, using two layers for each flower. I glued Ribbit Prills on the Oak Berry Lane Blossoms and colored the small stamens with the Vivid Chartreuse ink and used two or three per blossom. I used a sponge to apply glue to the edges of the white blossoms and sprinkled Crystal Ultrafine Transparent Glitter on the edges.
Using the Leafy Accents Cling Stamp Set, stamp out 3 or 4 of the large clusters in Ranger Archival Ink Leaf Green. Using a sponge dauber color the center of the flowers with Vivid Chartreuse and around the edges with Fern Green. Cut the Leafy Accents out using the Leafy Accents Die and run them through your cutting machine using the Leafy Accents Shaping Mold.
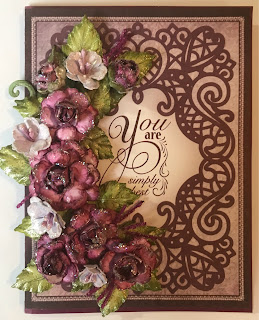
Assemble a lovely spray at the top left and bottom right corner of the card. Attach a Sentiment and optional embellishments.
Products Used: HCDP1-2110 Calla Lily Paper Collection, HCD2-7192 Eyelet Lace Frames Die, HCPC-3842 Oak Berry Lane Blossoms Cling Stamp Set, HCFB1-469 3D Blossoms Shaping Mold, HCD1-7200 Oak Berry Lane Blossoms Die, HCPC-3835 Leafy Accents Cling Stamp Set, HCD1-7193 Leafy Accents Die, HCFB1-467 3D Leafy Accents Shaping Mold, HCPC-3866 Tweet Cherry Blossoms Stamp Set, HCFB1-474 3D Cherry Blossom Shaping Mold, HCD1-7230 Tweet Cherry Blossom Die, HCST1-401 Deluxe Flower Shaping Kit, HCS1-457-1 Pastel Pearl Stamens - Small, HCPP1-468 Deluxe Flower Shaping Pack of 25, HCDA2-450 Stack and Store Daubers Pack of 30, 10"x7 1/4" Sheet of Blush Pink Paper, 159723 Designer Dries Clear Adhesive, 352854 Metal Tip for Adhesive Bottles, 85-Glitter Crystal Ultrafine Transparent Glitter, Ranger Archival Ink in Leaf Green, Fern Green and Vivid Chartreuse, StampinUp Crumb Cake and Blushing Bride Ink, Ribbit Prills, Spellbinder Tool N One.
Other Products Used: Hot Glue Gun and Glue, Scissors, Paper Trimmer, Scor-Pal and Die Cutting Machine.


Comments
Post a Comment